Sunday, May 31, 2015

Sewing or Finishing Your Garments by Hand

Do you want to learn how to sew like I do? I've volunteered to teach a one-hour class in period hand-sewing during the Incipient Canton of Kyngscreke's King's College event on Saturday, June 13th!


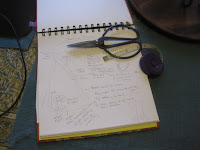
Creating example pieces, displays, and other wonderful things!

Class Description:

Focusing on Viking and Early Medieval stitching types, we will explore different period stitches, their application, and problem-solve some troublesome areas like inserting gores and keyhole necklines in both linen and wool. 10-15 only, please, so I can ensure materials for everyone.

Links and Handouts: 

Handout - Class Size, 4 PowerPoint Slides per Page
Handout - Full Size, 1 PowerPoint Slide per Page
My Pinterest Board for Viking/Medieval Sewing

Interested? 

Visit the event website for more information. 
The day's Facebook event is a great place to go for updates and questions.


Hope to see you there!

-Mel

Thursday, May 28, 2015

The Baroness' Heraldic Sideless Surcoat


Photo courtesy of Karyl Robbins Redmond, Steppes Warlord 2015.

This last fall during an Arts & Sciences evening, Baroness Katya asked me to make her a heraldic sideless surcoat. Now you may have noticed that this is the first appliqué project on my blog. There's a reason for that! I promised to step outside my comfort zone and do my best.

Of course, I didn't plan on breaking my foot before the deadline, so the best laid plans of mice became a little eschew. I still managed to complete it - and take on a new office - but I really should have allowed myself more time to rest and heal. She was great and understanding, but unfortunately I listened not to the sweet voice of reason, but to my own stubborn nature... and it kicked me in the tail again!

But on to the project!

This image is titled "Isabella before the Virgin and Child" and marked 1417-1418. She wanted something along the lines of this style, but without the ermine and using the heraldry of the Barony of the Steppes. She also asked me to - if at all possible - keep two parts of the device easily removable (the tree and the laurel wreath), so she could still wear the garment when she eventually steps down from office.

This was the initial plan, with a green top, black bottom, and a gold stepped sash across the body. The silver (oops!) wreath at top right and the Steppes' Oak on bottom left. I was supposed to do the trunk, roots, and branches of the tree and she would embroider the acorns later on.
I've seen some pretty poorly fitting sideless surcoats before, so I decided that my first task would be to shop for a pattern that I thought would be flattering, true to the form, and be something I'd enjoy trying out on my own project later on. I finally settled on Burda 7977.


Since I knew the sash was going to be a consistent element (and not removed later on), I went ahead and made it structural. For the life of me I couldn't convince it to lie straight and still leave room for the laurel wreath, so I allowed it to swoop just a little bit in order to get the full effect.
Tailor's chalk was totally my friend here, and it allowed me to measure like twenty times before the first cut.
I zig-zagged the edges to prevent any kind of raveling (it *really* wanted to ravel on me) and then pressed down the smallest seam allowance I could.
 After that, I used cotton jean thread (perfect color match, and cotton!) to sew down all the actual steps.
Once the steps were in place, the tailor's chalk came to the rescue again, and I was able to cut off the black fabric overlap while still maintain my seam allowance.
 A quick zip back through the machine and the two pieces were combined. To match the steps on the other side, I went over the bottom of the sash in the same manner.

 And here you have the combined front piece. There are some bits that need a little more cleaning up, but that will come soon!
Detail of the stitching behind the sash.
I have to admit, I was on some pretty nice painkillers for the broken foot while I was working on this section. I didn't realize that the laurel wreath was supposed to be silver instead of gold. Unfortunately, the baroness had to remove it and replace it with the correct color. But hey, we tried out the ease of removal and that feature seems to have worked fine!


And here's a detail of the (so I thought!) completed laurel wreath. I've learned more now about linen appliqué, but I'm not in a hurry to use it!
Detail of the (supposedly!) completed front, with top-stitching along the edges to maintain shape. I did fully line this sideless surcoat, so it has an excellent swish factor! It had been so long since I'd done a project like this that had forgotten some pretty salient points about making things lie flat. Baste, baste, baste! Cut to match! Luckily those were relatively minor things and easily corrected.

And the tree! It turned out a little smaller and higher than I'd like, and that's mostly due to the way I had to work on it while my foot was in the cast. On the ironing board (my working surface), it looked perfect, but there was no way for me to fully lay it out and look at it full scale. I've already made the offer to re-do it now that my foot has healed, but she seems happy with it, and that was the whole goal.

Besides, it may be a little tree, but it's a cute one, too!

This is what I thought would be the final image of the dress. I do again sincerely apologize about the color mix-up. I'm blaming it on the pain meds!


Finally, we have one more shot of Baroness Katya wearing it at court during Steppes Warlord, with the matching underdress that she made herself. Lovely!

Photo courtesy of Karyl Robbins Redmond, Steppes Warlord 2015.

Wednesday, May 27, 2015

The Pumpkin Dress - Florence, 1520

After four years in the DFW area, we finally made it down to The Scarborough Renaissance Faire in Waxahachie this year... and we did it in style!

Thank you for the picture, Andrea!

I knew it was going to be hot, but convinced that I would be happier going in garb, I decided to see what I could do with what I had on hand. I had some orange linen blend fabric left over from Mom's Age of Exploration unit, and some white muslin left over from another previous project. 

And the underdress? Well, if it's not quite right for the picture, then I'm not terribly concerned. You can't see much of the underdress in the paining for one, and then... well, it was the absolute first complete piece of SCA garb I ever made, sewn entirely by hand back in 2001. I'm just stoked it's survived this long - and that I can still wear it! I freshened it up with some new ribbon for the drawstring neckline and sleeves, and it was good to go!

In the end, I created a lovely linen dress from a measly three yards of linen, scrap muslin, and the three purchases I did have to make: 1/4 yard of black linen (for the big stripe and sash), 1 spool of linen weaving thread for weaving the thin stripe and top-stitching, and the black ribbon for lacing it up the back. 

Before the ball got rolling, I started clicking around on Pinterest to get some ideas, and my eyeballs screeched to a stop when I landed on this painting labeled, "Detail from Francesco Bacchiacca's Preaching of Saint John the Baptist, approx. 1520."

I Googled around, and discovered that it was supposed to be a Florentine design. Well, that cinched it. I adored the time Jake and I spent in Florence, and the idea that my dress design lived there hundreds of years ago was just too cool to pass up.


I allowed myself to get a little impatient with this project, and instead of following a pattern in greater detail, I just based the cut off another dress. I wish I had spent a little more time on it now, as the shoulders don't match the painting very well.
All the construction was done by hand, so turning it right side out at last was a treat. I do prefer flat construction whenever possible (remember my key-hole necklines and gore inserts?) and doing it this way allowed me to get a lot of precision in the cut of my wider black band around the neckline.
Finally, it came time to sew the straps together. I pulled one inside the other - wrong side out - and then matched up the black stripes as best as I could. There was a little adjustment to be made, but overall it went swimmingly!

After I connected the straps, I tackled the skirt section. I wanted to keep the two pieces apart as long as possible in order to reduce extra wear and handling. In this picture you can see the un-dyed linen thread I used to backstitch the seams. For the top-stitching, well, I went insane. I tried pulling threads from the edges of the fabric and using them for a perfect thread match. The idea is quite period, and maybe if this had been full linen instead of a linen blend I might have been more successful at it. As it was, many many... words of not-so-polite encouragement were hurled as the thread broke again... and again... and again. I managed to finish the back seam (the only one actually on the skirt) but then said "screw that!" and did the hem with some of my linen weaving thread.

In this picture, I'm pinning together the bodice and skirt sections. After the whole pulled thread fiasco, I felt the need for order. A lot of order. Guess my sign: Virgo!

Here you see the two sections combined, with the bodice's lining tucking away all the raw bits.

In the last picture, you saw the top of the back seam. Here's the bottom, with the hem. While it was a frustrating bit of business, I'm happy that it turned out so cleanly.

Once the two sections were together, it was time to add the narrow black band. The black linen fabric wasn't cooperating, so I got out my loom, rigid heddle, and black linen weaving thread to make my own. Not my favorite project, as it's hard to tell the threads apart, but it got the job done.

Finally, it was time for the eyelets. Not my favorite part, but hand-sewing them is much more period than the metal grommets you see so ubiquitously. At least it gave me a chance to use the bone awl I picked up in the outdoor market in Bologna!

Here's the back of the completed dress, with the underdress underneath. I ended up combining my favorite elements of the two main orange dresses, but I really like the black sash with it. Eventually I may try to figure out the tassels, but for right now it's working just fine.

Here's a better view of the dress. I love it!


At some point I may the black stripe around the bottom, but for right now it's a wonderful, wearable piece that makes me feel pretty!

Works Referenced:


Please note that this was intended as a heat-influenced homage and not an actual documentable piece. I did apply my knowledge of stitching types and lacing eyelets, but this owes too much to modern influences to be anything but that. Both the underdress and the overdress originated with commercial patterns.

Arnold, Janet. Patterns of Fashion: The Cut and Construction of Clothes for Men and Women c. 1560-1620. McMillan London Limited, Hong Kong: 1989. Figures 128, 137, 163, 163 and 164. (For eyelet/lacing details)

Crowfoot, Elisabeth, Frances Pritchard, and Kay Staniland. "Sewing Techniques and Tailoring." Museum of London: Textiles and Clothing c1150-1450. The Boydell Press, Woodbridge: 2002. Page 150-164.