Showing posts with label Weaving. Show all posts

Saturday, July 30, 2022

Tablet Weaving for Beginners 7-30-22


Good evening! If you attended my Beginning Tablet Weaving class today at Stormgard's A Game of Thrones and StormGods event, here is a link to the class Google Slide presentation. The heat was awful, but it made me so happy to see how excited you guys were to learn that tablet weaving can be fun and approachable. Thank you so much!

Sunday, June 26, 2022

Klappenrock Teaser

 So... I've been puttering. You probably noticed that I haven't posted anything recently. We moved from The Barony of the Steppes in Ansteorra (Dallas, TX) to The Barony of Stromgard in An Tir (Vancouver, WA) in December 2019. Since then, I've had a couple long-term projects going. I should be finishing several of them soon. I thought I would get at least one of them typed up today, but I didn't realize how much maintenance the site needed. I had to replace a ton of pictures, and I am so sorry they were unavailable to you. I've also backed everything up in case we have image issues again.

So, until I can get the next post up for you, here's a teaser for my current longest-term project, a gray wool klappenrock (crossover tunic/coat) for Jake. 


This was pieced together with a combination of JoAnn wool blend patterned remnant and two grey wool-blend dresses from the second-hand store. It is sewn by entirely by hand, using period sewing methods and wool embroidery thread. 


The only thing currently holding up this project is the embellishment. Last time I spoke with my laurel, she suggested I work on my seam treatments and embellishment. Well, and actually establishing a place and time for my own persona, but that's another project. Here you can see a segment of the trim (I had to re-warp, so I have a small separate piece of it) where I plan to sew it. The goal is to do silk seam treatments for the crossover section and silk tablet-woven trim in the colors of Jake's device on the cuffs, bookending the pieced pattern section.


Some of you already saw this on Facebook, but this was my first experience with my warping board. Here you can see the first section of green silk down.


Here's the beginning of the project on my belt loom. This was the best Christmas gift exchange item EVER. I love this thing, and how easy it is for me to adjust my tension. Not to mention how portable it is.


Here's my current progress. After I had to re-warp the loom, I went a little overboard. Notice the mini pony-tail ties? It actually works really well. No regrets!

It will be a while before I finish this project, so in the meantime these may be accomplished first:

  • Jaime's reclaimed wool blend Hangeroc and Serk
  • Jake's Thorsbjerg trousers with Skjoldehamn brók hem treatment
  • Woad-dyed linen Serk
  • Woad-blue wool Hangeroc
  • Persona building/reigning in my garb and accessories to a tighter period and location

Thank you for your patience!

Sunday, September 17, 2017

Rigid Heddle Woven Shawl


As I continue to work on getting more and more accurate garb for my Viking persona, I decided to take the next step in my weaving and start weaving the fabric that I sew with.

My husband got me a Beka rigid heddle loom, with a 10-dent rigid Heddle. I went to White Rock Weaving Center, where they recommended Kraemer Yarn's Eileen 100% Merino wool for weaving and later dyeing.


The yarn turned out to be a little small for the rigid heddle, and moving forward I would like to get a 12-dent so I can pack my threads in a little bit more tightly.


As you can see, it's working well, but the threads are still a little too far apart for the kind of sewing I want to do with this fabric later. At this point my hope was that the fibers would full a little during the dyeing process. Sorry that the perspective is a little strange. We live in a small apartment, and the only kitty-safe place I could store it was hanging off the back of a door. Surprisingly enough, it didn't seem to have any noticeable impact on the tension!


I decided to weave a couple sample pieces to capture the stages of the dyeing process. In this picture I'm weighing the fabric and samples in order to figure out the amount of alum I'll need for the first step of the dyeing process.


Here you can see the woven wool in the alum bath. I held out the first sample to compare later.


While the wool was enjoying its nice alum bath, the madder was finishing up its overnight soaking. I researched madder before, for my Hedeby Harbor bag, and I enjoyed the thought of continuing that experimentation with a new modifier (iron) at the end of the process.

I like to use big pickle jars, because I can easily seal them. With cats, any kind of a barrier is good to keep them out of things they shouldn't be in. Also, I like being able to see the color as the madder steeps and creates the rich liquor.


I poured the madder liquor through a strainer and into the dye pot. The three glass jars fill my 8 gallon pot nicely. I did have to get my smaller, finer strainer out and do some skimming before putting the wool in. I didn't want the debris to get trapped in the wool.


Much cleaner now, and with the wool soaking up its first color.


And the final iron bath, to sadden the color of the wool. I didn't want to let the wool linger too long, so this was the shortest bath. Sadly, I didn't grab a closer picture of that stage.


The image above features the three fabric samples: the fabric as it came off the loom, the fabric treated with the alum mordant, and finally the alum treated fabric dyed with madder.


And now we have the final product... or at least the point in which I had to stop because Laurel's Prize Tournament was in a couple hours.

Feedback from the Laurels:

The Laurel's Prize Tournament was a fantastic experience, and I left feeling like my mind was swimming in new ideas and different approaches. For one thing, I didn't check the composition of my water, as harder and softer water can yield different results.

Another suggestion had to do with chalk. The weld dyeing project I had on display had to do with using chalk and iron on weld-dyed fabric to turn it a nice, spring green. The chalk served to boost the intensity of the weld's yellow before the iron bath turned the yellow fabric green. The laurel in question suggested using chalk, for the same color-boosting purpose, next time I dyed with madder.

Several people remarked on the uneven nature of the color. I dyed the fabric after weaving it, so there are some striping issues. The laurels I spoke with suggested some alternate dyeing methods, like scrunching it together to work the dye evenly. Several people also suggested including dyeing the yarn before weaving with it. That way, the final weaving will have more of a heathered effect.

Finally, a couple people mentioned changing from plain weave to twill, which was a popular style in period.

Thoughts on Moving Forward:

The biggest concept that came out of this projects was that it's important to make and follow a plan, especially if you want results you can replicate. Flying by the seat of your pants can be fun, but it's not going to reliably give you the kinds of results you'd like.

I'll post an update soon, but I'm going to try to make more in a similar color. This time, I am going to make and follow a plan regarding quantities and duration. I'm going to dye the yarn before weaving it, and then do plain weave to match the previous piece. Hopefully, then I can make a full garment.

So, watch this space for updates!


Saturday, August 15, 2015

Hedeby Harbor Wooden Handled Bag


Think about those wonderful “magical moments” we have in the SCA, where for just a minute you lose of track of where and when you really are and feel transported. It’s hard to do that when you’re toting around your modern purse! Accessories can mean the difference between a costume and clothing, so period purses jumped their way up my priority list.

I decided to make a Viking-era wool bag, sewn by hand in period stitch types with wool thread, out of fabric colored with madder, a period dye. The wooden handles are hand-carved from ash at the same scale as the original piece from Hedeby Harbor. The band and strap are tablet-woven from silk using a pattern from the Oseberg Ship Burial.

Before I started on the final project, I decided to test the waters with a trial run in linen, using a thin pair of walnut handles purchased from the same lady who made my loom. 


The construction was all linen, with a woven trim both for an accent and the strap. I used fabric tags to attach the handles because, on the pieces I saw on Pinterest, I liked the look better than the yarn versions.

This project taught me that I chose too flimsy of a linen for the construction, that the tabs were annoying to sew and felt less secure, and that the linen trim I chose to use for my strap had a tendency to roll and show its ugly side.


When I decided to start the final project, the format that finally caught my eye is based on the “objects of unknown function” in the Haithabu Museum. In Die Holzfunde von Haithabu by F. Whestphal, the author speculates that they are purse handles, or Taschenbügel. 

Photo by Tom Nordulf from the Haithabu Museum

As evidenced by the picture below, there are several examples which have survived. Of all those extant pieces, only one pair has been found. Now, Whestphal used the example of that pair to extrapolate that the others may have started as pairs as well. Almost all the replicas I’ve seen has followed that format, so I decided to follow suit in my version to see how well it would function.

In Die Holzfunde von Haithabu by F. Whestphal, pg. 81
In the museum image above, the handles were made from (from top), ash, maple, and ash. Of all the images I could find, only one even hinted at how the bag may be attached to the handle: Figure 66 in Die Holzfunde von Haithabu, which is also shown in the museum image.

The length of this particular piece was 181mm, with a height of 48mm, and a thickness of 9mm. To get as close as possible to that, I scaled the image on my computer and traced it onto graph paper. I then used Grandpa’s Old Timer pocket knife and a jig-saw to do almost all the work. I did use a drill briefly to gain access to inner sections and speed up the process after a slip of the knife led to a trip to the ER, 4 stitches in the palm of my hand, and a month of recovery time. 

Finally, after cutting out the profiles, I rounded the edges and added the incised design lines, which make the arches pop. A little sanding and polishing later, and it’s on to the next stage: Mordanting the fabric and dyeing the wool. This project was a great excuse to explore period dyes, and I decided to start with madder.
In Viking Clothing, Ewing notes, “…This picture of red clothes as a mark of rank or luxury is confirmed by archeology, where madder-dyed clothes are found only in graves of the highest status,” (168). In Viking: Dress, Garment, Clothing, Glæsel also says, “Madder was a prized dye. The Oseberg Queen’s dress was dyed with madder,” (26).  I ordered chopped madder roots and alum from AcrossGenerations, and then got to work.
I had two pieces of wool I was considering for the project: a light cream and a gray. I took samples along the way and even tossed in some of the wool thread (Brown Sheep’s “Indian Warp”) I picked up from White Rock Spinning and Weaving to sew with. Here you can see the fabrics in the alum mordant bath, which allows the dye to bond better with the fabric.

I soaked the 4oz of dried madder roots overnight. The next day, after applying the alum to the wool, I strained out the roots and poured the dye into the pot.

I took samples along the way, and recorded the different colors I obtained. Unfortunately, I was not very impressed with the color the gray wool became.

Luckily, one of my friends had some madder she wasn't using. The two batches were quite different – the original 4oz was dried but still fairly fresh, and it was mostly the thicker roots. Emma’s was about 4 years old and a mix of wide and thin pieces. The original batch yielded brighter colors, where Emma’s batch yielded some lovely browner tones.

Once the fabric was dyed and washed, it was time to move on to the sewing. I decided on a simple three-piece construction with one long rectangle in a “U” shape and two sidepieces with their bottoms rounded. While I prefer to sew with linen, in Viking Clothing Thor Ewing says, “Thread used for sewing is usually a plied yarn matching the fibre of the cloth; thus woollen yarn sews wool and linen sews linen.”

The colored sewing thread I originally planned to use lost its definition and felted somewhat in the dye bath, so I used the un-dyed original yarn for the hidden stitches. For strength, I used backstitch and then flat-felled the seams with the fluffier, colored yarn. 

I decided to add a contrasting band of un-dyed gray wool at the top of the bag, which allowed me to hide away all the knots and make it look a lot cleaner. Wool was used to attach the handles to the bag, in the same kind of way that the original appeared to be. I chose wool for this as well, because as evidenced by the archeological record, protein-based wool is much more likely to survive the centuries than plant-based fibers like linen, so for those scraps of thread to survive on the extant bag handle, it would be incredibly unlikely to be linen. Hem stitch was used to hold the gray wool’s edge down until the silk tablet weaving could be attached, to make it even prettier. 

Now for the tablet weaving! The band’s design and fiber content (silk) is based on a thin band from the Oseberg Ship Burial. The pale green silk is Gutebrod Bros, size F. I didn’t have a silk thread that contrasted enough for the design, so I dyed some of their light gray size FFF with a blue RIT dye which is supposed to look like blue dyes of the period.
Margareta Nockert's Osebergfunnet, Tekstilene

According to Vedeler, “The Oseberg grave chamber is dated by dendrochronology to the year c. 834, giving the silks this year as a terminus ante quem. (This means that the silk must have been made before this date.) It is possible, and not unlikely, that these silks changed hands through one or more generations, prior to the burial,” (3).

On Shelagh Lewins’ website she lists both an extrapolated pattern for the extant band and a slight variation which alters the rotation of a single card.

I chose to make both, although I did eliminate one non-essential card for the sake of symmetry. Mina, our new rescue kitty, decided to "help."
Such an innocent expression! Once both bands were completed, all that remained was to sew the decorative band down and attach the other band to the handles as a strap.


Documentation


Baker, Jennifer. "Stitches and Seam Techniques Seen on Dark Age/Medieval Garments in Various Museum Collections." 2009. <http://nvg.org.au/documents/other/stitches.pdf> 11 June 2014.

Crockett, Candace. Card Weaving. Interweave: Canada, 1991.

Dean, Jenny. Wild Color: The Complete Guide to Making and Using Natural Dyes. Watson-Guptill Publications: New York, 2010. 

Ewing, Thor. Viking Clothing. Gloucestershire: Tempus Publishing, Inc. 2006.

Glæsel, Nille. “Natural Coloring.” Viking Dress Garment Clothing. CreateSpace Independent Publishing Platform. 2010.

Lewins, Shelagh. “Tablet Weaving for Dark Age Re-enactors: The Narrow Oseberg Band.” Shelagh’s Website. 2015. <http://www.shelaghlewins.com/tablet_weaving/Oseberg_narrow/Oseberg_narrow.pdf

Priest-Dorman, Carolyn.“Colors, Dyestuffs, and Mordants of the Viking Age: An Introduction.” Þóra Sharptooth’s Viking Resources for the Re-Enactor. <http://www.cs.vassar.edu/~capriest/vikdyes.html>

Vedeler, Marianne. “Silk from the Ship Burial at Oseberg, Norway.” Silk for the Vikings. Oxbow Books: Havertown, PA 2014.

Westphal, Florian. Die Holzfunde von Haithabu. Wachholtz Verlag Neumünster: 2006.

Sunday, August 24, 2014

Mom's Age of Exploration Unit: Apron Dress Retrofit


What happens to your old garb? 

Think about the early sewing projects that make you wince when you look at them now. How about the pieces that just don't fit right... they could be a little too short, or bind too much around a slightly rounder belly than you'd like to draw attention to.

Their lives don't have to be over. 

I've made a summer project of updating, retro-fitting, and/or completely re-making my garb using what I've had on hand. There's been a lot of seam ripping, dyeing, some creating piecing, and other quick fixes which have breathed new life into my family's SCAdian wardrobes. 

I had no idea how wasteful I'd been before this. I had two totes of garb that just didn't work for us anymore, and I guess I just forgot the lessons I learned at Theatre UAF, ripping seams, removing and reapplying dye. I'm glad I finally wised up. 

It started with my husband's fighting tunic. His favorite tunic contains a color combination I'm really not fond of, which means he can feel free to do whatever he wants to it without me really caring about damage.

He attended several fighter's practices without me, so it wasn't until later that I realized the tunic's short sleeves were leaving big parts of his arms exposed, his neckline was too wide, and that the overall length was just too short to cover much of anything once he had a kidney belt binding it up. 

I swiped it from him, tossed it in the wash, and ripped out the hems. I had a few scraps of the rust colored main fabric left, so I used them to lengthen the arms. There was not enough of it to lengthen the overall tunic, so I pulled out some of the leftover contrasting teal linen and added a wide strip of it to the bottom. 

While those changes only took me a couple hours, they dramatically improved the usefulness of the tunic. It was a major "ah-ha!" moment for me, and after that I looked at my old projects in new light.

When Mom asked me for my help costuming three ladies in male and female Viking garb for her Age of Exploration unit, I knew I'd be diving again into those old projects. Some of the pieces were in good enough shape to go her way immediately, but my teal wool apron dress had some strap issues that needed to be addressed. 

As you can see, the straps on these apron dresses pre-date my more detailed research. Now that's not a major issue, but as much as I'm in love with the wool of this dress, the straps have always been too long for a good fit, and they also roll up in ugly ways. 

Seam ripper to the rescue! I removed the straps and ripped out all their stitching. I used every scrap of this fabric making this dress, so I had to cut the strap fabric in half longways in order to make long enough shoulder loops.

After the straps were fixed, I decided to add a little more pizazz to the dress by tablet weaving some gorgeous silk. I'd had the black silk on hand for years, and it was only recently that I was able to find a lighter contrast of the same silk: Gudebrod Bros, Size F. The Etsy seller was even nice enough to tuck in an extra spool for me to play with!

Here's the design I used, based on the chevron pattern in Schweitzer's “Beginning Tablet Weaving” handout. It took 14 cards, with a simple four forward, four backward motion.
One of the things I like about tablet weaving is that it makes it easier to try out quick tricks like this: Looping the thread over the bar on one side so I don't have to tie a knot there. My pattern only uses even numbers of each color, so it works perfectly! 

Also, to avoid the knot getting in the way on the other side, I divide my threads into quarters. The left top and bottom sections are tied together over the bar and pushed to the left, while I mirror the same on the right. Then, as I weave, I just wind the finished band in between the two knots. No more fighting to keep it from messing up my tension!

After that, all that was left was to attach the trim to the top of the apron dress. I am completely and totally in love with this! The pale green color looks more like a cream in contrast, and once it was sewn down on both sides it just made the garment come alive.

And, finally, we have the result. When you compare this to what it looked like initially, it is so much better! With the weaving, this update took about ten to twelve hours of work, but it also rescued a project that had been relegated to the old garb hoard and made it fresh and fabulous!


There are other projects in the hoard that need attention, so I will be continuing to go back through it and rescue/update what I can. Stay tuned!


Bibliography:


Baker, Jennifer. "Stitches and Seam Techniques Seen on Dark Age/Medieval Garments in Various Museum Collections." 2009. <http://nvg.org.au/documents/other/stitches.pdf> 11 June 2014.

Ewing, Thor. Viking Clothing. Gloucestershire: Tempus Publishing, Inc. 2006.

Glæsel, Nille. Viking Dress Garment Clothing. CreateSpace Independent Publishing Platform. 2010.

Hägg, Inga. "Viking Women's Dress at Birka: A Reconstruction by Archeological Methods." Cloth and Clothing in Medieval Europe: Essays in Memory of Professor E.M. Carus-Wilson. Ed. N. B. Harte and K. G. Ponting. Pasold Studies in Textile History. 1983.

Schweitzer, Robert. “Beginning Tablet Weaving.” Forward into the Past. 2 April 2011. <http://www.fitp.ca/articles/FITPXXI/beginning_tablet_weaving.pdf>
Geijer, Agnes. "The Textile Finds from Birka." Cloth and Clothing in Medieval Europe: Essays in Memory of Professor E.M. Carus-Wilson. Ed. N. B. Harte and K. G. Ponting. Pasold Studies in Textile History. 1983.

Thunem, Hilde. "Viking Women: Apron Dress." 25 February 2015. <http://urd.priv.no/viking/smokkr.html>

Thursday, August 14, 2014

Mom's Age of Exploration Unit: Viking Under Tunic


Sometimes learning history can be a bit of a drag, but in my mother's classroom it is a fantastic journey of discovery. For her upcoming unit on the Age of Exploration, she has asked me to help her costume herself and two of her peers in Viking garb. I already made her clothing for a Viking lady, but she wants her kiddos to see the male version as well, so a little gender-bending is in order!

I decided to start with the under tunic, mostly because it's been a tight summer and I had the fabric on hand. Well, most of it. I had to do a tiny bit of piecing at the back, but it worked perfectly!

For the design, I decided to go with what Marc Carlson describes as Nockert, Type 1. This style is very well represented, and I saw either identical or very close versions on Þóra Sharptooth's site, as well as in Nille Glæsel's book and on the Hurstwic site. Some versions include the front gores, while others leave them out. I decided to include them, for ease of motion and wear. I've seen (and made) a lot of tunics with only side gores, and they have a tendency to pull a little too tightly over the tummy.

When I moved on to the construction, I decided to pull out all the stops. I referred back to Jennifer Baker's wonderful stitching type handout and decided to use a (possibly overkill) backstitch to join the pieces, with a flat fell finish. I also used my favorite hem-stitch, although some of my hems were so small that they actually became rolled hems. As an additional step towards authenticity, I decided to actually do all the stitching with a linen thread. I usually go straight for Guterman's Heavy Duty threads, because both my husband and I are very hard on garments, but since this is for classroom use I did finally pull out the spool of linen thread I've been hoarding for the better part of a decade!

Finally, I decided to add tablet-woven trim to the neckline. In men's garments, this seems like it would be more of an outerwear feature, but I justified it with the thought that Mom will also be using this tunic for her female garb as well, where the length of the under tunic will be hidden.

Here's an image of backstitch in action. I love how much stronger it is than a simple running stitch. I've received comments before on how I'm doing modern over-kill here, but it is a documented stitching type, and if I was a real Viking lady, I'd rather do it right the first time than have to keep re-sewing the same seam when it breaks.
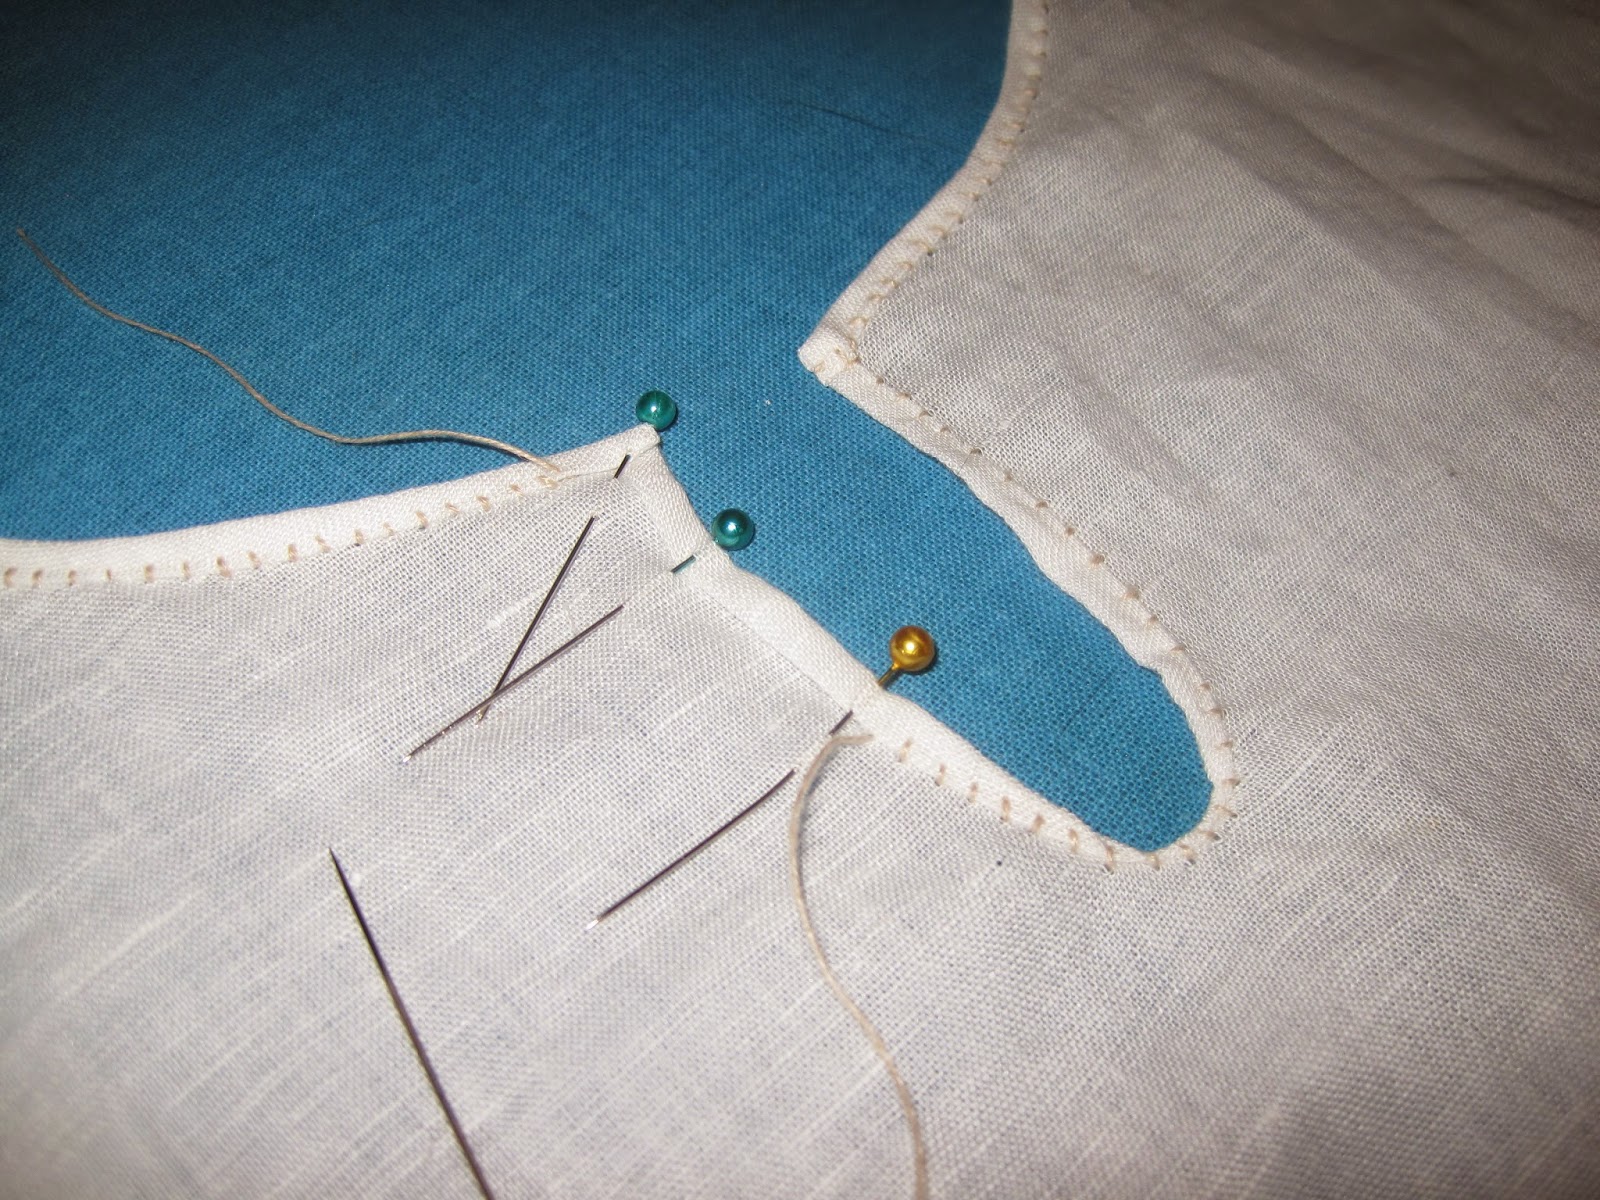
My secret for good necklines is to sew them flat. I always make sure to finish them before I sew up the sides, and they are so much easier that way! This actually became more of a rolled hem than a straightforward hem stitch, but the extreme narrowness is actually more period. Don't want to waste precious fabric!
In this view, you can see the garment laid out, with only the front and back gores missing. I will usually do those last, because otherwise it can get a little overwhelming to work with the entire thing open at once.
More backstitch, with a hint of my workspace/ironing board. In an apartment as small as ours, it meets my crafting needs perfectly!
This image was taken while I was finishing the side seam. You can see some of my tools of the trade. I had no idea when I started how important the beeswax would be while I was working with the linen thread. It has a tendency to felt and knot, but an occasional swipe with the beeswax makes a huge difference!
Here's a view of the underarm gore. Once I started sewing the gores open, there was no going back! The overlap both strengthens the seam and allows me to neatly finish the other seams as well. I still don't like them, but now at least it's not outright hatred!
And now we get to the tablet-woven trim. I can't believe I've only been rigid heddle weaving since January, and tablet weaving for the last couple weeks! For the trim on this tunic, I wanted a very fine, narrow band. After my experiment with silk thread, I decided to actually weave with my linen thread. It took three colors, but I am in love with the results!
And, finally, the completed garment on my duct-tape mini-Mom! Really, for all the costuming I've been doing for her, the duct-tape form has been a huge help.
All in all, I'm pretty proud of this project. It brings together a lot of the skills I've been learning and refining this summer, and without that additional study I wouldn't have been able to create something so authentic. 

Finally, I'm going to leave you with an image of this tunic with the hand sewn apron dress I completed just before this project. They may be different sizes, but together they demonstrate a pretty productive summer in terms of my costuming skills.


As always, I would love to hear your thoughts, so please don't hesitate to comment. Thank you!

Bibliography:


Baker, Jennifer. "Stitches and Seam Techniques Seen on Dark Age/Medieval Garments in Various Museum Collections." 2009. <http://nvg.org.au/documents/other/stitches.pdf> 11 June 2014.

Carlson, I. Marc. Some Clothes of the Middle Ages: Kyrtles/Cotes/Tunics/Gowns. 2003. <http://www.personal.utulsa.edu/~marc-carlson/cloth/tunics.html> 14 August 2014.

Ewing, Thor. Viking Clothing. Gloucestershire: Tempus Publishing, Inc. 2006.

Glæsel, Nille. Viking Dress Garment Clothing. CreateSpace Independent Publishing Platform. 2010.

Østergård, Else. Woven into the Earth: Textile Finds from North Greenland. Denmark: Aarhus University Press. 2004.

Priest-Dorman, Carolyn. "Viking Tunic Construction." Þóra Sharptooth's Resources for the Re-enactor. 1997. <http://www.cs.vassar.edu/~capriest/viktunic.html> 5 January 2014.

Short, William R. "Clothing in the Viking Age." Hustwic. 2014. <http://www.hurstwic.org/history/articles/daily_living/text/clothing.htm> 14 August 2014.